Unleashing the Power of Lambda@Edge for Dynamical Routing of Viewer Requests to any origin.
In today’s digital age, delivering content efficiently to a global audience is crucial. AWS Lambda@Edge, in combination with CloudFront, offers a robust solution for dynamically routing viewer requests to different origins. This blog post will guide you through setting up this powerful feature that allows you to route to the appropriate origin (s3) based on the domain name (host-header).
Prerequisites
Before we begin, ensure you have:
- An AWS account with access to Lambda and CloudFront services.
- Basic knowledge of JavaScript and AWS services.
Step-by-Step Guide
Step 1: Understanding the Workflow
![]()
This diagram visualizes how viewer requests from different domains are intercepted by CloudFront and routed to a different origin with the help of a Lambda@Edge function.
Step 2: Creating S3 buckets
We start by creating 2 buckets with each a simple index.html file identifying each bucket. Next, we need to make them public-read. Go to S3 permission settings and ensure that you disable block public access for your bucket. Then, scroll down to the bucket policy section and past the following policy to grant public read access to all files in your S3 bucket. Make sure to replace the YOUR_BUCKET_NAME placeholder with your actual bucket name.
{

"Version": "2012-10-17",

"Statement": [

{

"Effect": "Allow",

"Principal": "*",

"Action": "s3:GetObject",

"Resource": "arn:aws:s3:::YOUR_BUCKET_NAME/*"

}

]

}
NOTE: Before you choose Save, be aware that every object in this bucket will become readable publically.
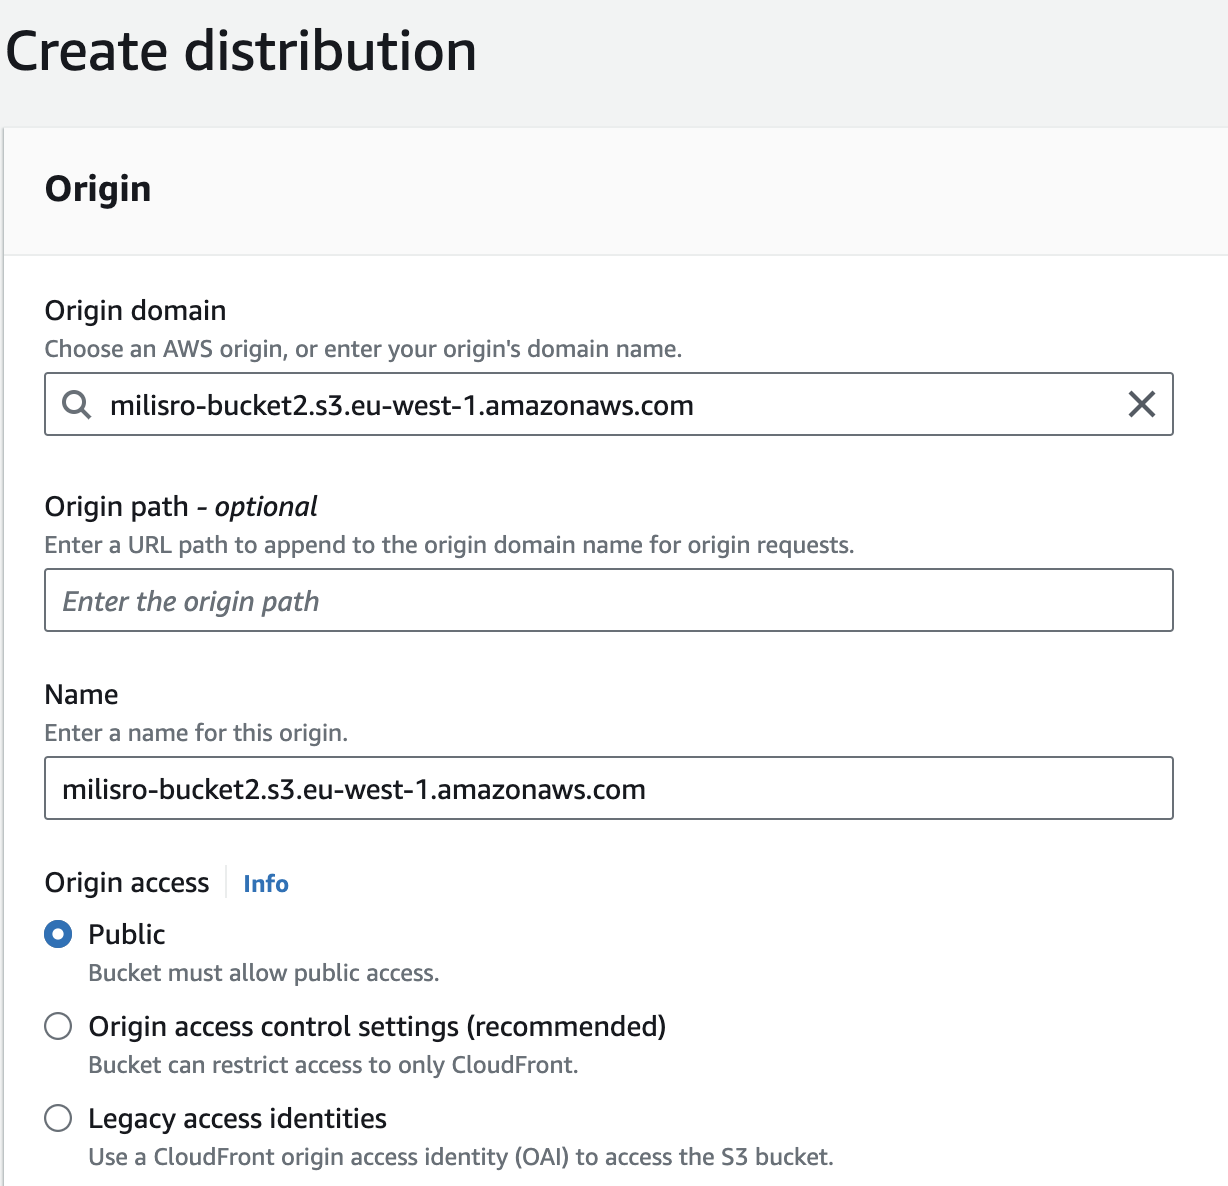
Step 3: Create a CloudFront distribution
After both S3 buckets are created, we can create our CloudFront distribution. As origin we select one of our 2 previously created buckets. And for origin access we select Public as our S3 bucket is setup with public-read access.
NOTE: If the origin is not an AWS resource or is not accessible via the dropdown, you can still use the custom origin url in the Origin domain input field.
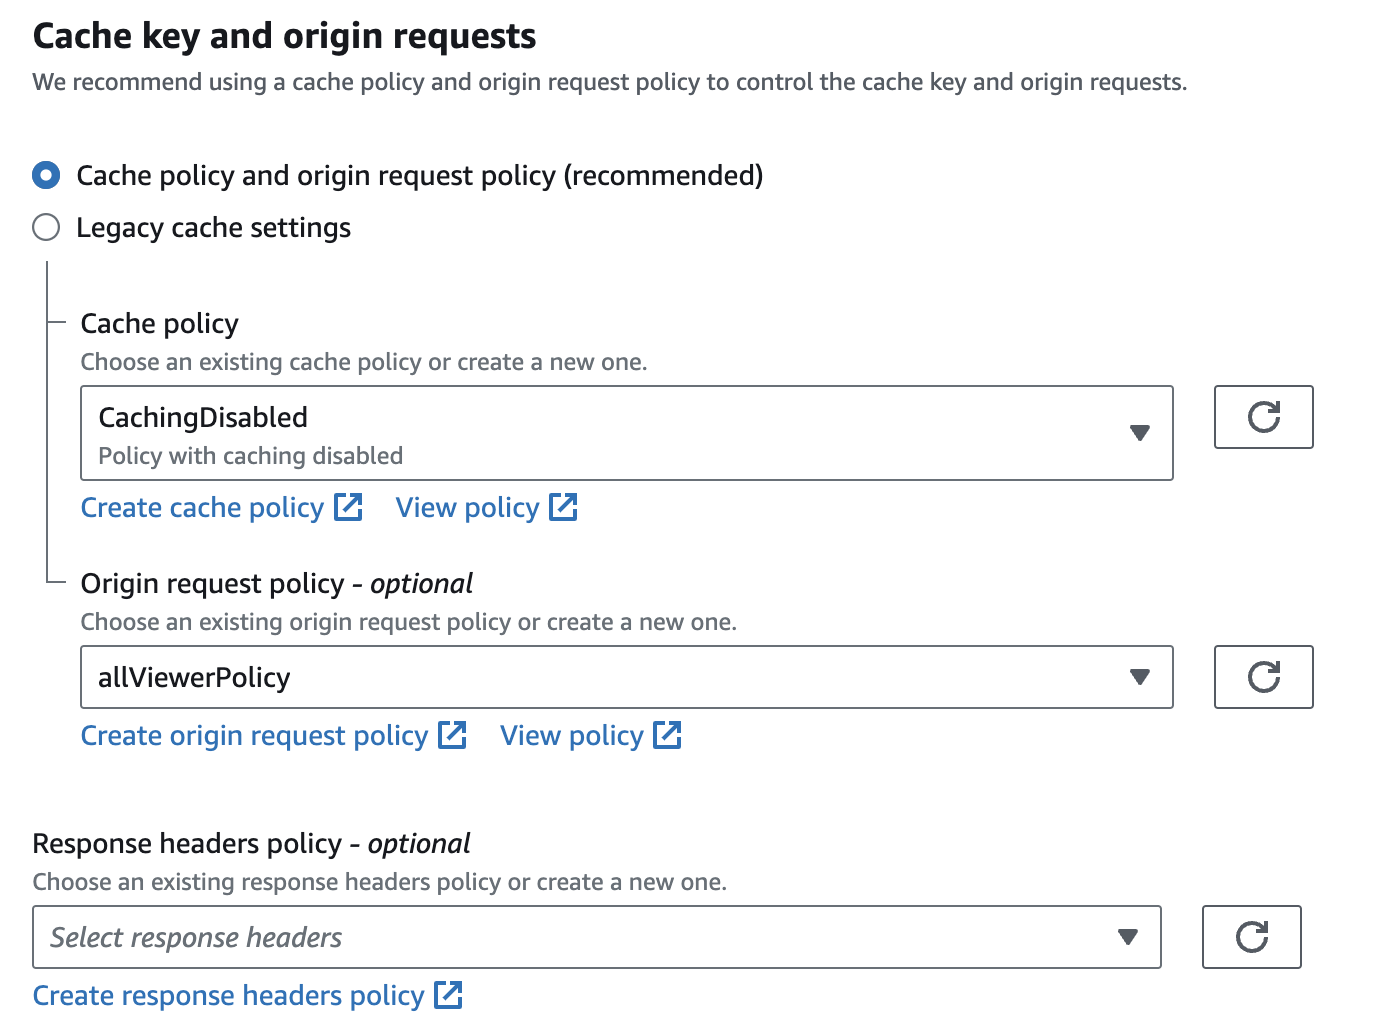
Scroll down to the Cache key and origin requests subsection within the Default cache behavior section. Here, it is very important to change the Origin request policy. There are multiple AWS managed policies that we can use but the we want to use is grayed out.
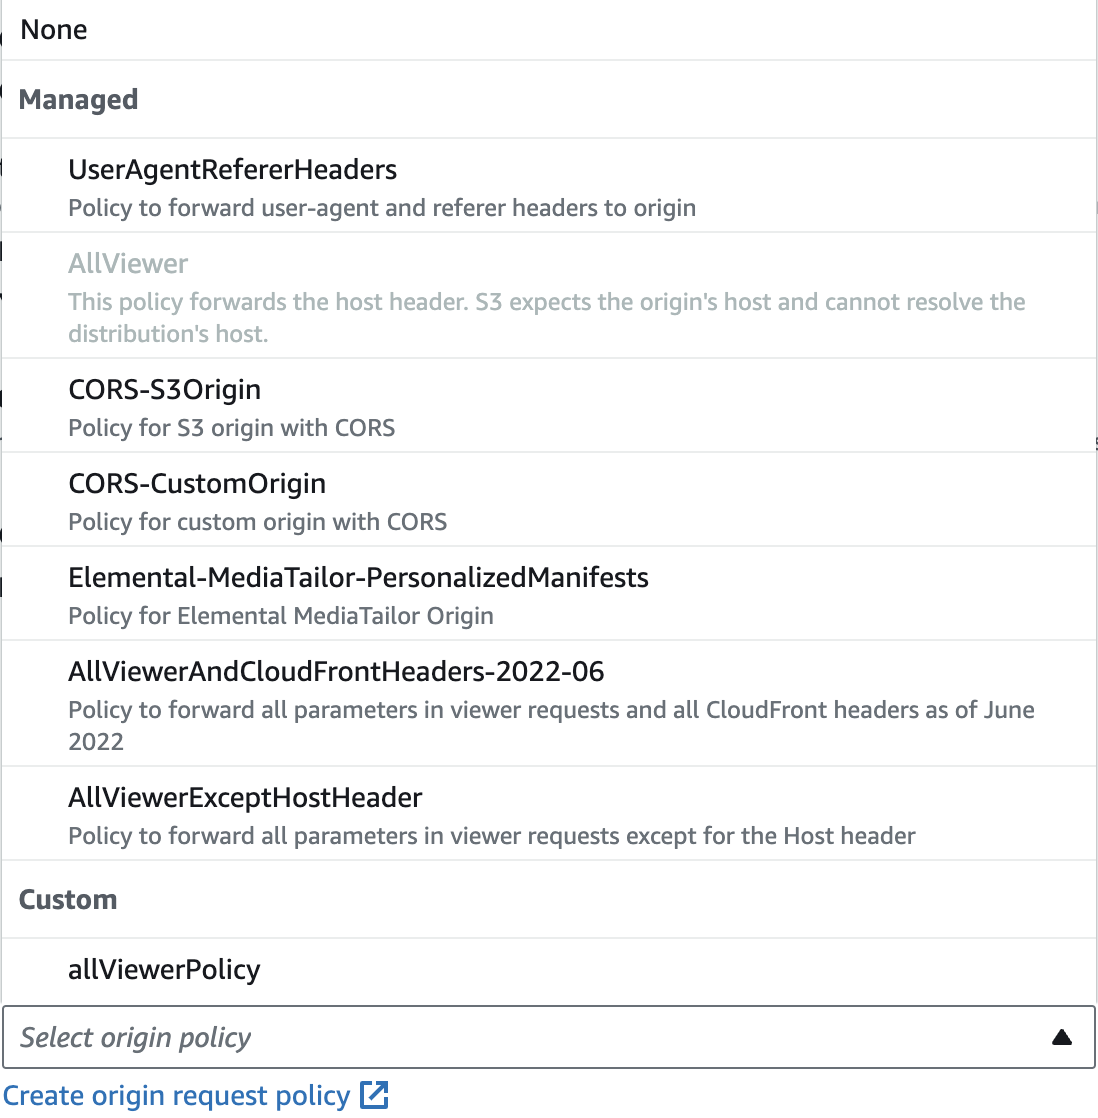
The AllViewer policy is unavailable because, in some cases, this policy can cause problems when using with an s3 bucket as the origin. For my use-case I have not found any problems with using a policy that allows all headers to be passed through to the origin. The workaround for this is to create a custom origin request policy that allows all headers.
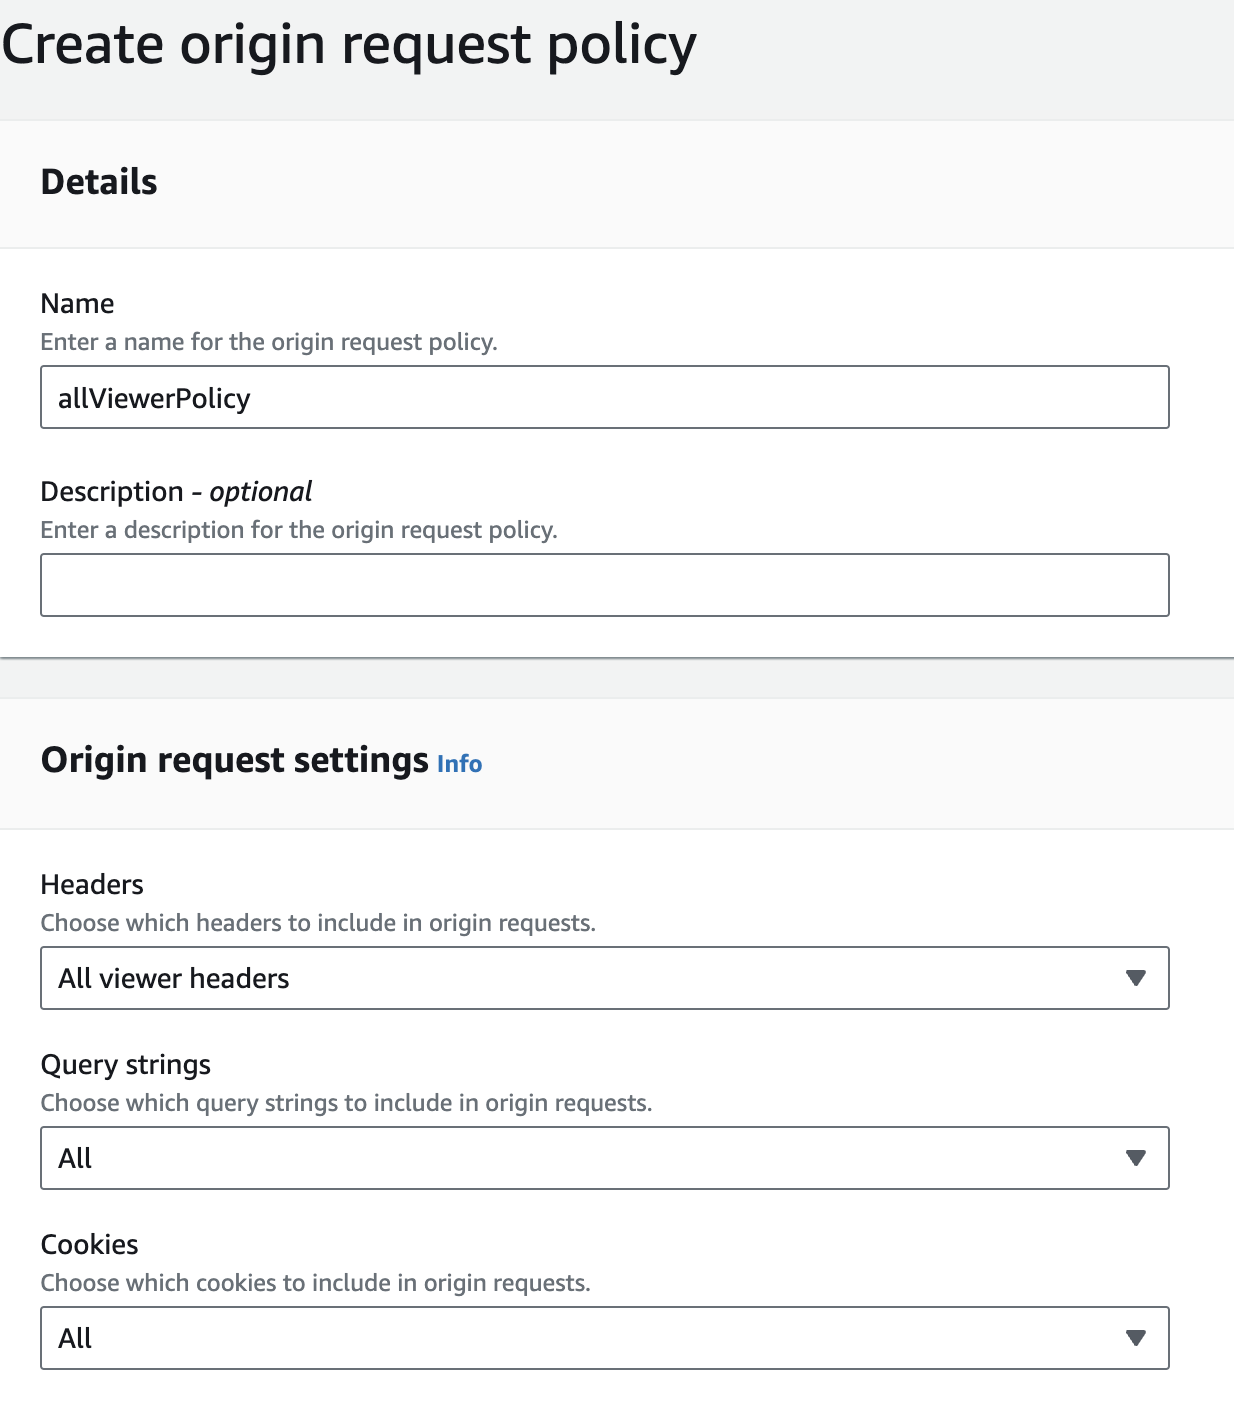
Setting this policy allows all headers, including the host header, to be passed from the viewer request to the origin. And therefore allowing us to read out the host header in our lambda function and changing it to get content from the correct origin. As for Cache policy we have selected the CachingDisabled policy to avoid any issues regarding caching.
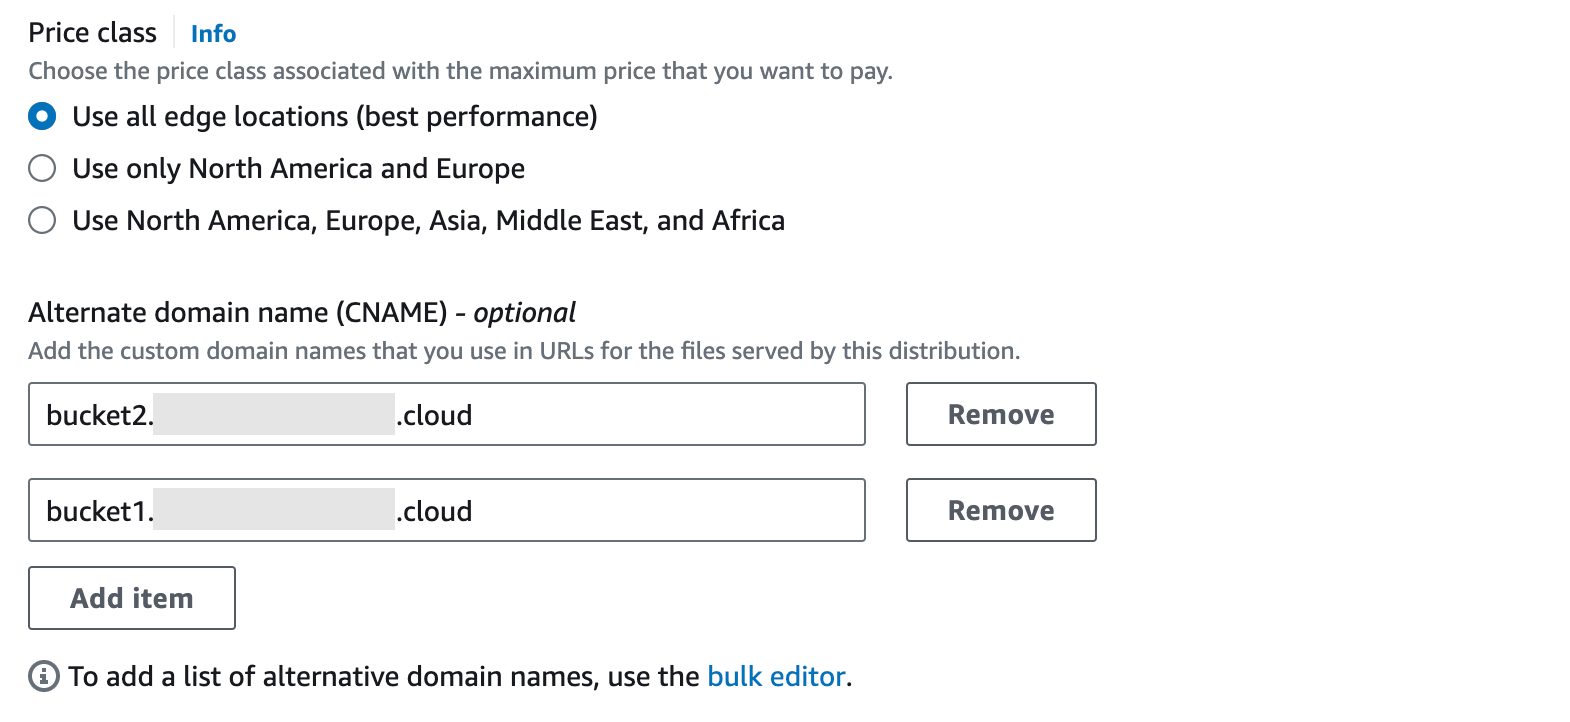
Next, you’ll need to scroll further down to Settings.
Here you will need to add a valid Alternate domain name, this can also be a wildcard CNAME. Because we don’t have access to a .nl and .be domain we have used bucket1. and bucket2. as an example.
Then add/create a valid Custom SSL certificate for this alternate domain name.
To create a certificate you need to click on Request certificate. For Certificate type leave it on “Request a public certificate” and click on Next. Then fill in all the Domain names you want to request a certificate for. Leave all the settings default and click on Request. Then click on the correct Certificate ID to open the settings for the certificate and go to the Domains section. Here you can find the CNAME name and the CNAME value. You’ll need to add these as CNAME records to your dns zones for the certificate to become valid.
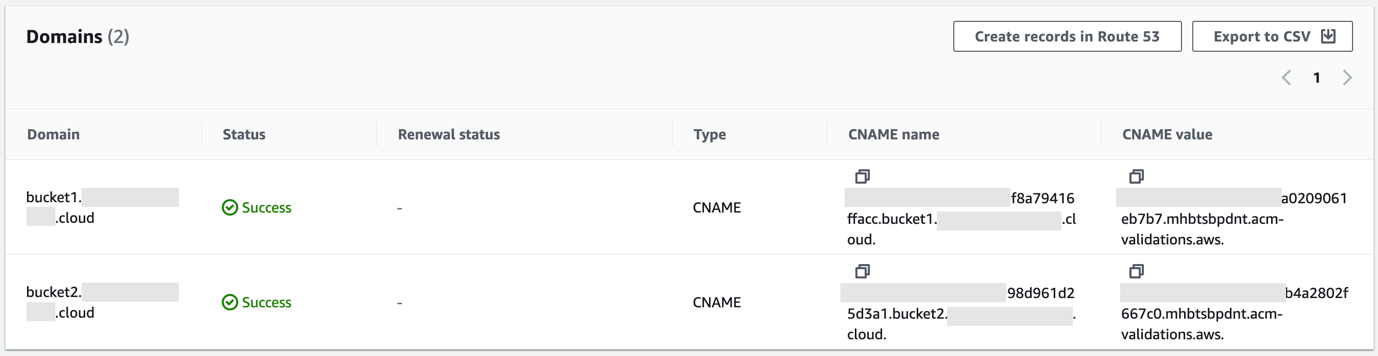
Once the validation is successful you’ll need to refresh the Custom SSL certificate list. Then you can add the certificate to the CloudFront distribution.

Then click on Create distribution.
Now make sure to add a CNAME record for both domain names to the correct dns zone. As value for both records you’ll need to input the CloudFront Distribution domain name.
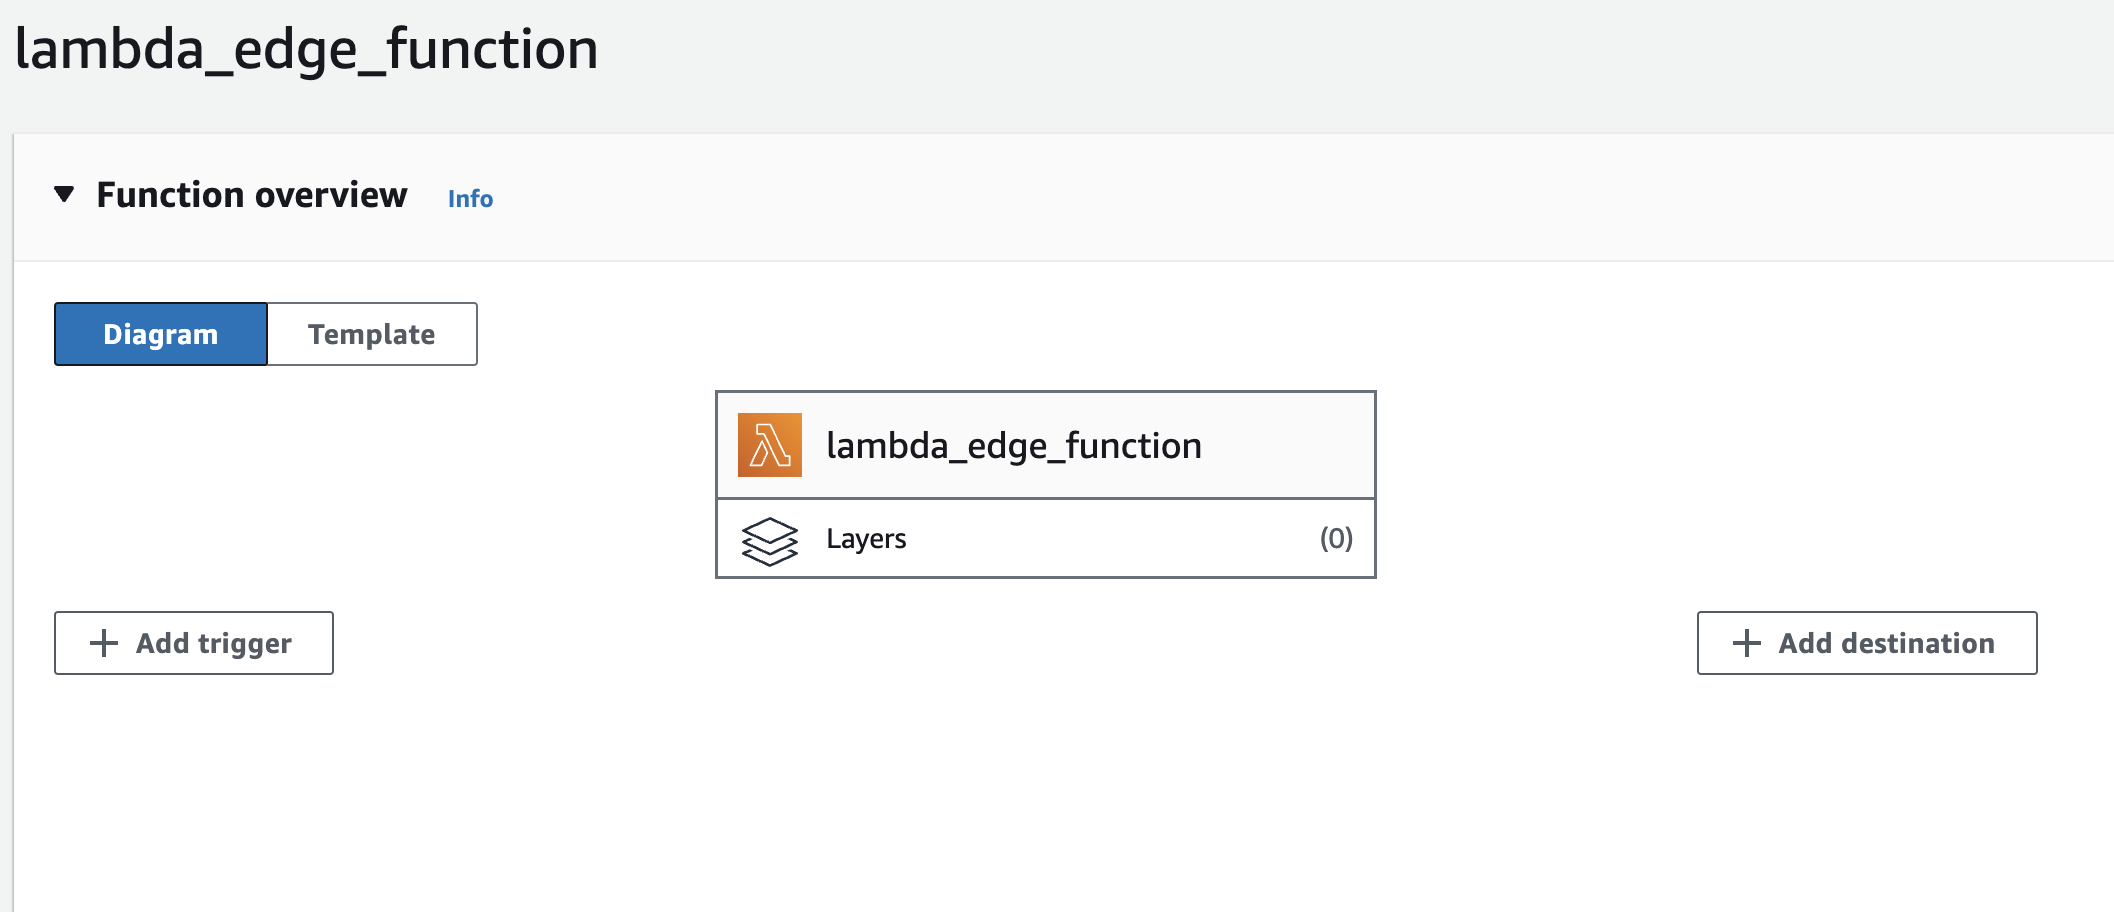
Step 4: Writing the Lambda@Edge Function
Now that we have our CloudFront and origins setup correctly we can create our Lambda@Edge function. The Lambda function is the heart of our setup. It examines the host header to determine the request’s origin and modifies the request to route it to the designated domain.
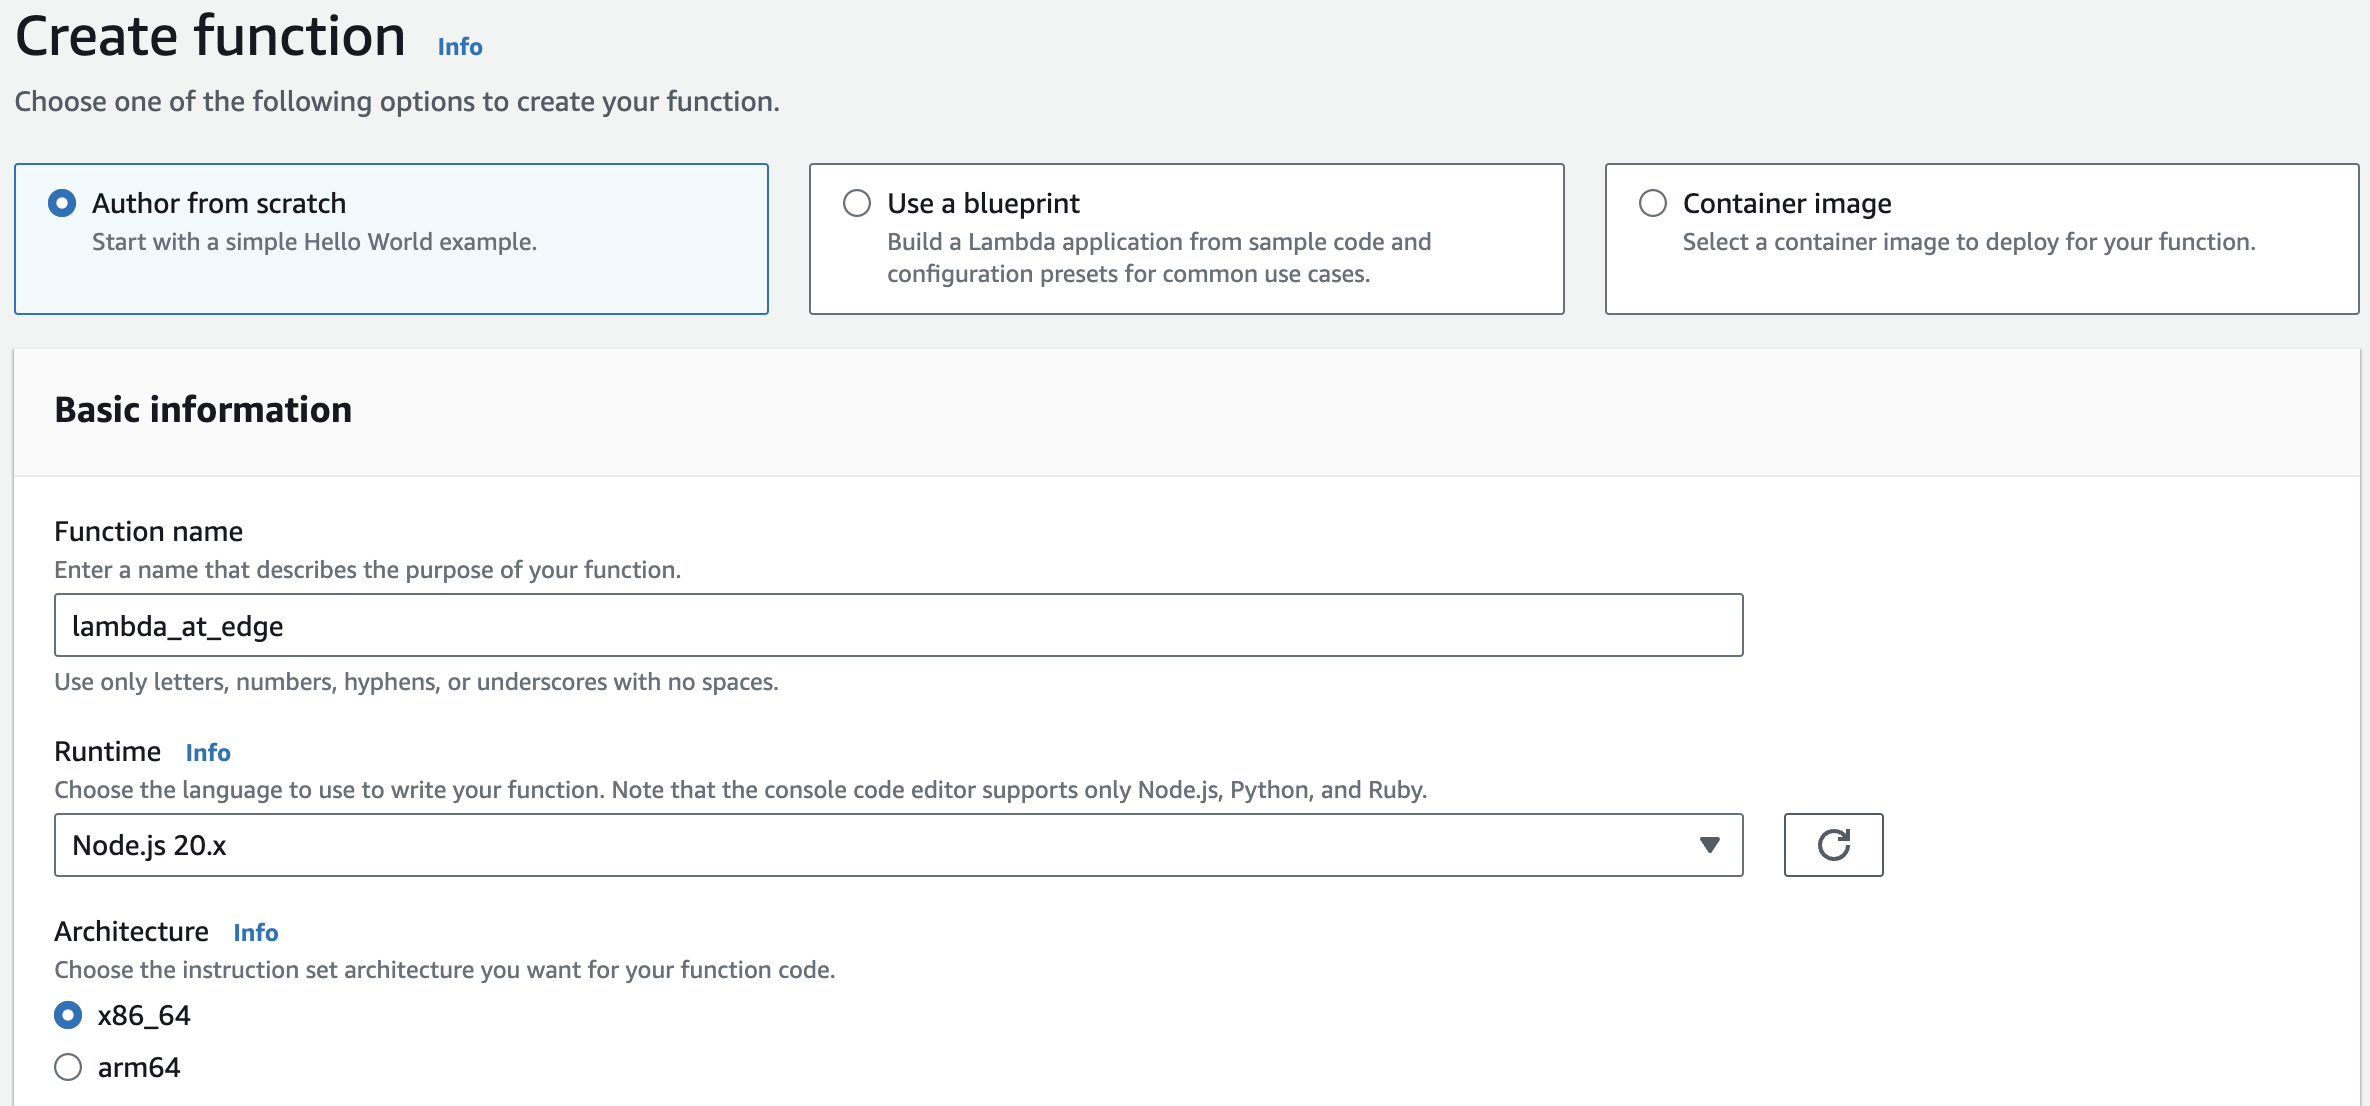
First, we need to go to the Lambda Console and ensure that we are in the us-east-1 region by selecting US East (N. Virginia) from the drop-down list in the top right. Then we choose Create Function to create a new Lambda function.
NOTE: We need to select the us-east-1 Region as the location where we create the Lambda function. Otherwise we are unable to connect to a CloudFront trigger.
When creating a lambda function you will need to select Author from scratch. Then give the function a name and select the runtime. We will be using Javascript, so in our case we will need to select Node.js 20.x.
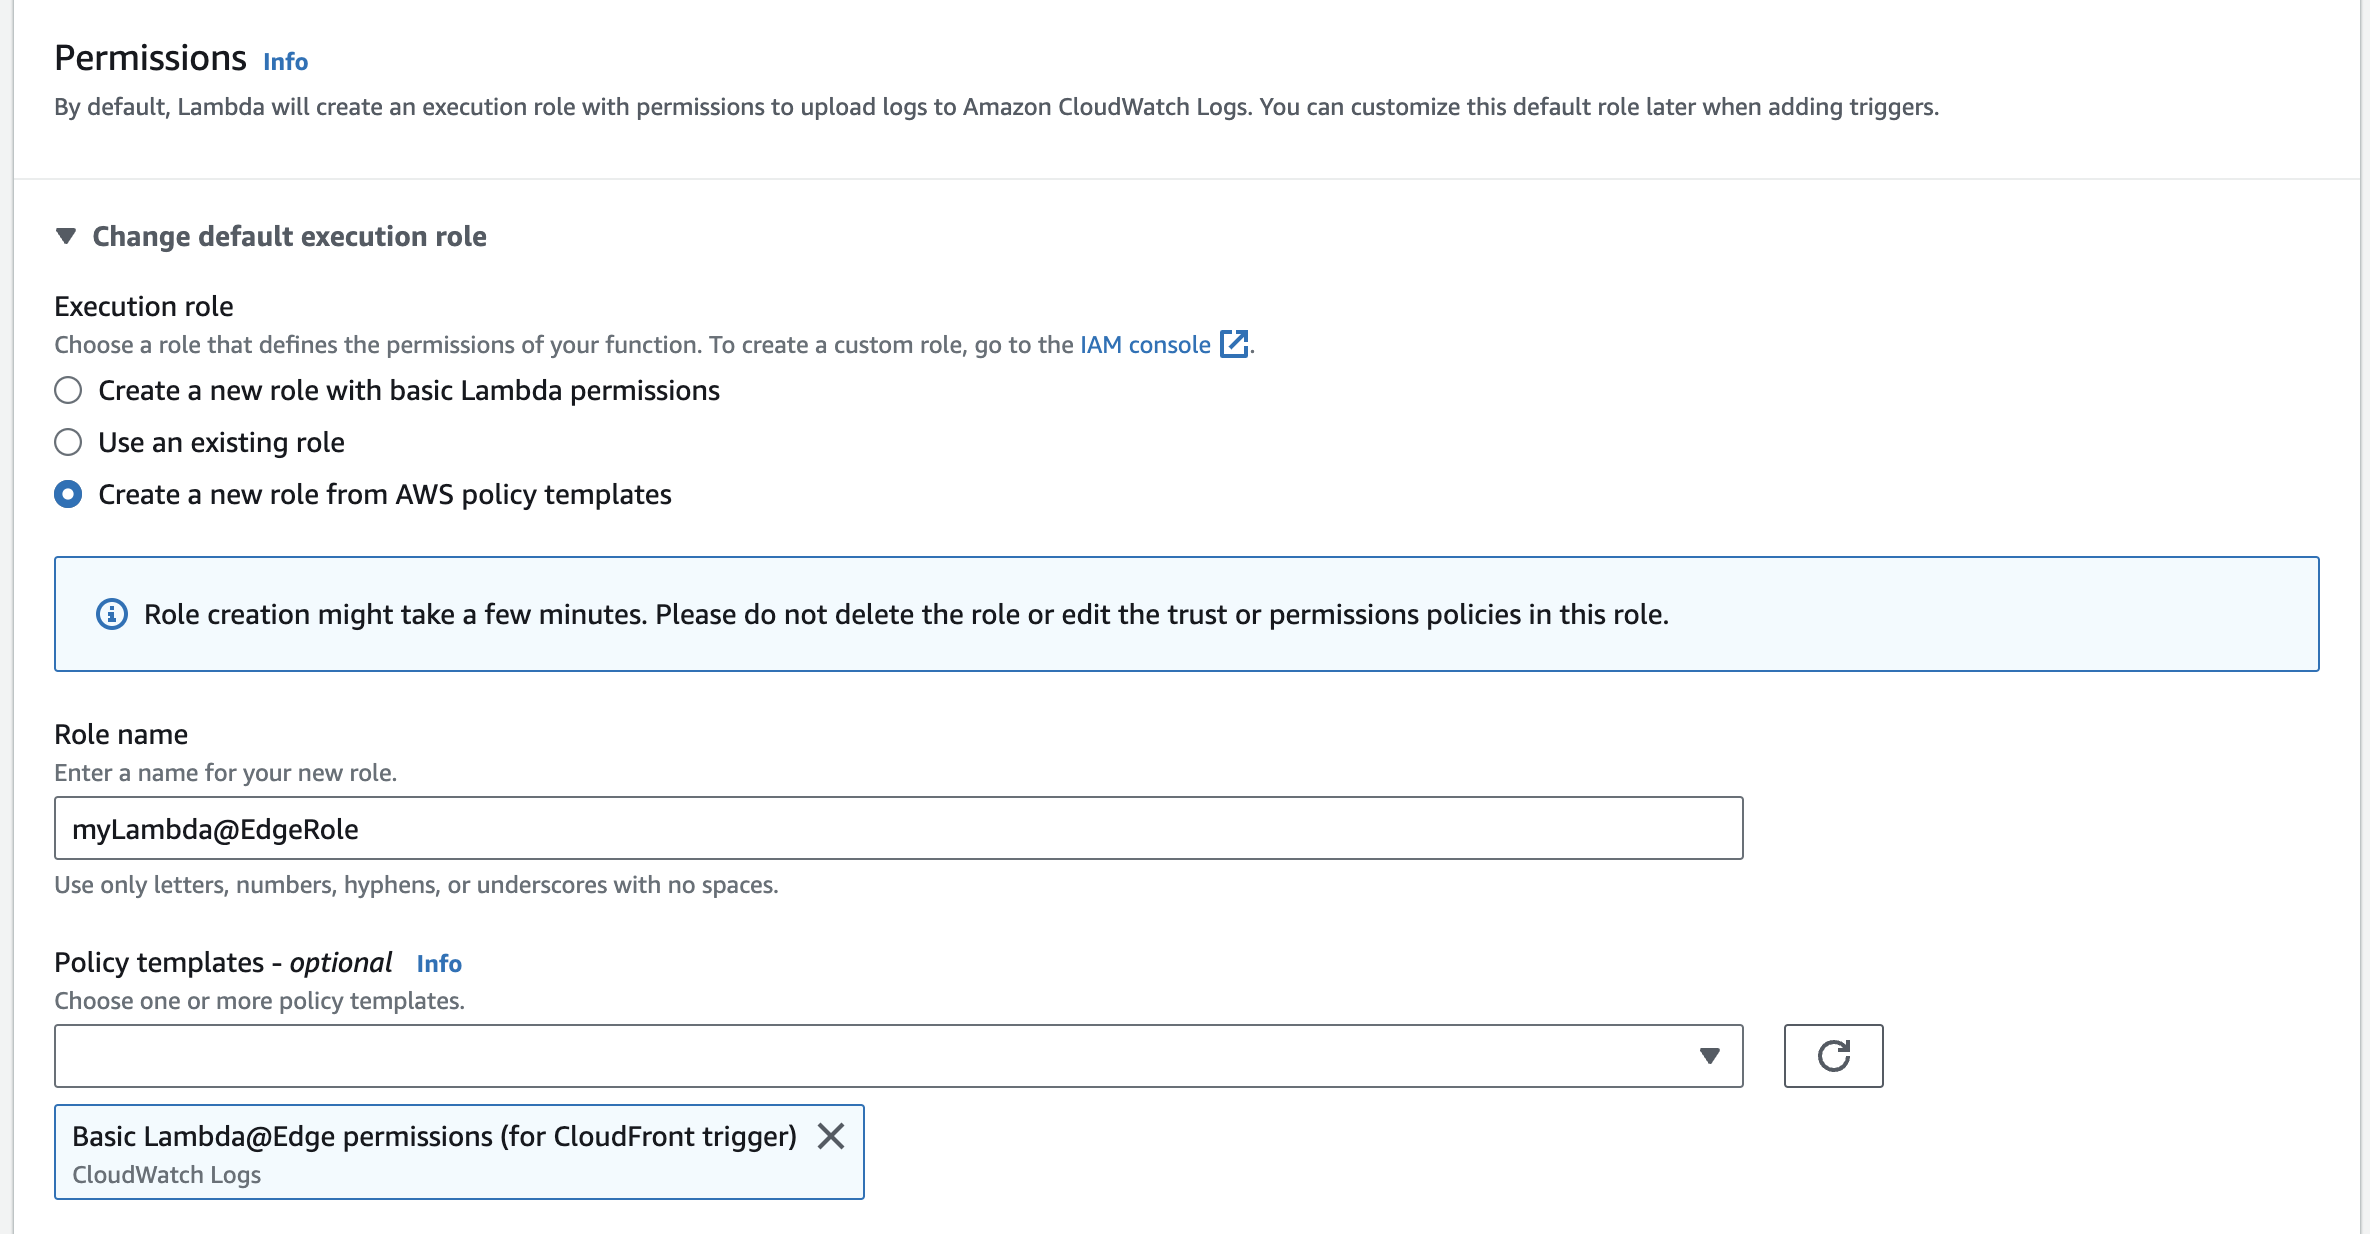
Scroll down to the permissions section and select the last option under Execution role. Here you give the new role a name and under Policy templates you select the Lambda@Edge permissions (for CloudFront trigger) policy.
Then click on create function.
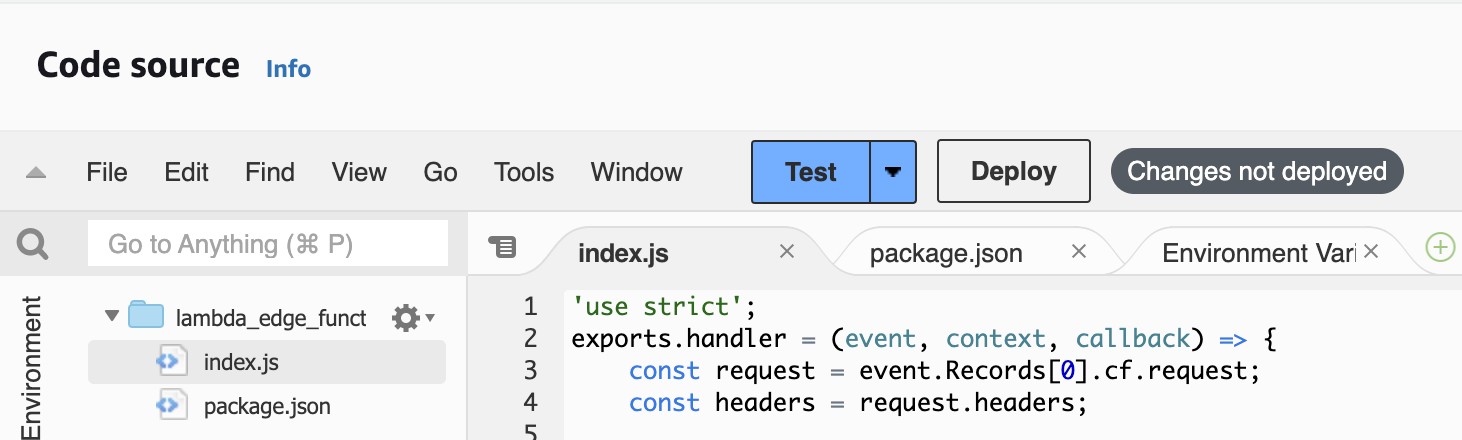
Under the Code source tab we will need to change the existing files. Make sure you have the following file structure.

You will still need to change mydomain.nl, mydomain.be and the destDomain values to you corresponding resources, but here are the code snippets you can use:
index.js
'use strict';

exports.handler = (event, context, callback) => {

const request = event.Records[0].cf.request;

const headers = request.headers;


const host = headers['host'][0].value;

let destDomain;


if (host === "mydomain.nl") {

destDomain = 'd2xp4h6ffr29w8.cloudfront.net';

} else if (host === " mydomain.be") {

destDomain = 'd3m2ure4d7jvt4.cloudfront.net';

}

request.origin = {

custom: {

domainName: destDomain,

port: 443,

protocol: 'https',

path: '',

sslProtocols: ['TLSv1', 'TLSv1.1', 'TLSv1.2'],

readTimeout: 5,

keepaliveTimeout: 5,

customHeaders: {}

}

};

request.headers['host'] = [{key: 'host', value: destDomain}];

return callback(null, request);

};
package.json
{

"name": "lambda@edge",

"version": "1.0.0",

"description": "Lambda function to reroute requests",

"main": "index.js",

"scripts": {

},

"author": "",

"license": "ISC"

}
Step 5: Deploying the Lambda Function
The next step is to deploy our lambda function and set up CloudFront to trigger the lambda function.
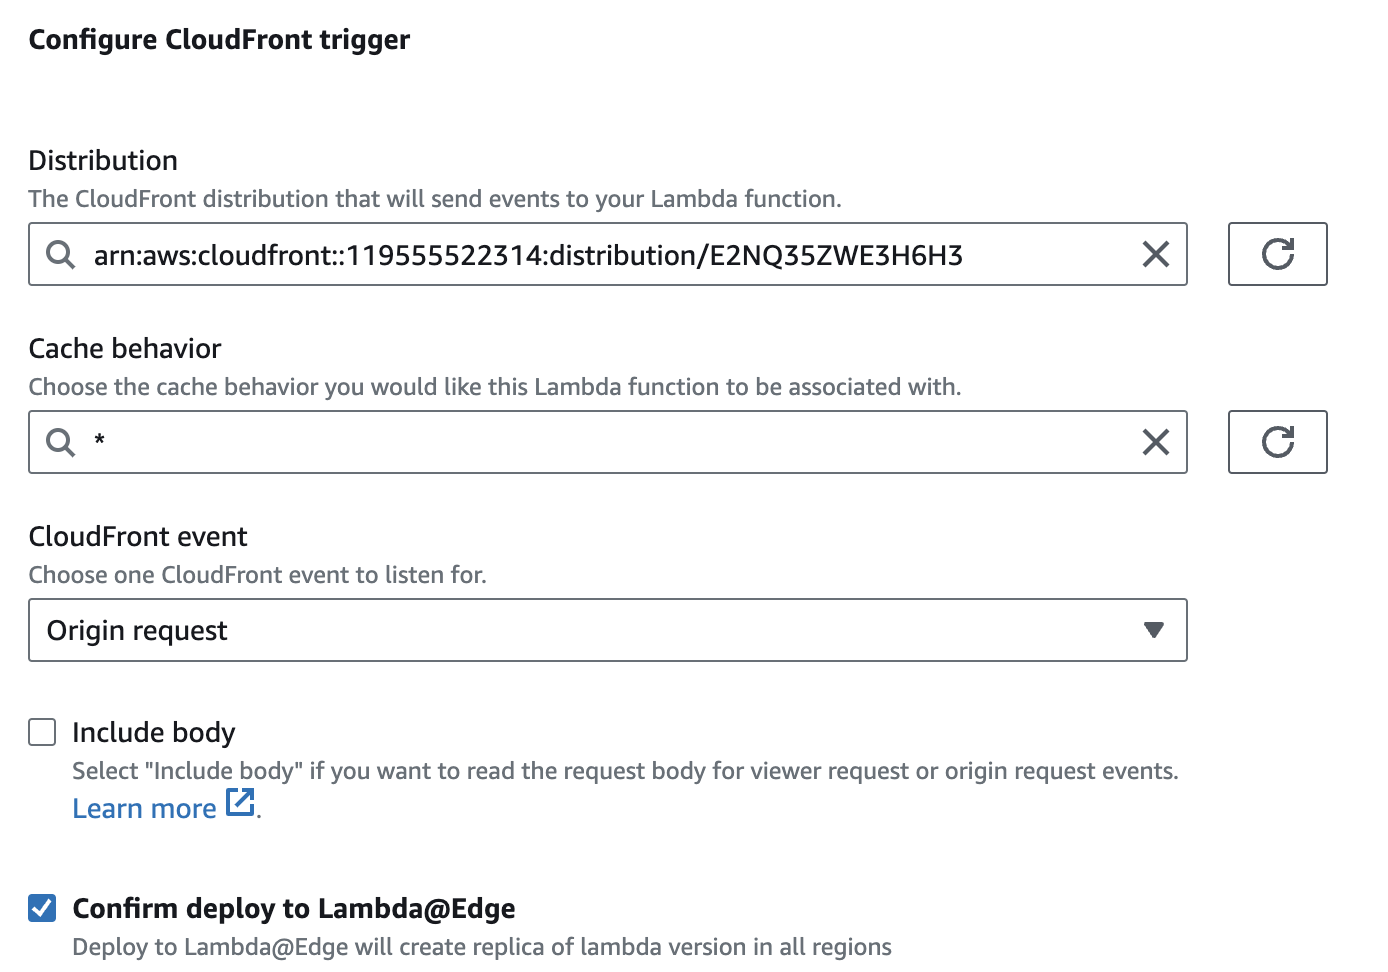
Scroll to the top and click on Add trigger.
In the drop down menu select CloudFront, then click on Deploy to Lambda@Edge. Once in this menu you’ll need to select the previously created CloudFront distribution and make sure the CloudFront event is set to Origin request. Using the Origin request instead of Viewer request trigger, we will be able to change the host and custom domainName headers in the request.
Finally you’ll need to check the box for Confirm deploy to Lambda@Edge and click on Deploy.
Step 6: Verifying the Setup
After deploying the function and configuring CloudFront, you can test the setup by making requests to mydomain.nl and mydomain.be. You can verify that the requests are routed to the correct origins.
Conclusion
In this post, we showed you how you can dynamically route viewer requests to any origin using Lambda@Edge.
By following these steps, you can leverage AWS Lambda@Edge to create a responsive and efficient content delivery network tailored to your needs. This setup not only improves performance but also provides a scalable solution for managing traffic across multiple domains.